
Are you excited to find all the treasure maps in Dying Light: The Beast? These documents are scattered all throughout Castor Woods. There are a few contextual clues–including the usual “X” marks the spot concept–that point you in the right direction. However, trying to search every nook and cranny can be very taxing, especially in an open-world game. That’s why our guide has you covered, so sit back and get ready to explore a land overrun by the undead.
Where to find all treasure maps in Dying Light: The Beast – Treasure Hunt guide
There are a total of 20 treasure maps in the game. While several can be found in safe spots and safe zones, others are in rather inconspicuous and easy-to-miss locations. Once you pick up one of these, you’ll be able to recheck them in your Collections – Treasure Hunt menu.
In any case, our guide is organized depending on the number and letter classification of each map–i.e. A1, A2, A3, and so on. Some of the maps and rewards are in the same general area. It’s up to you if you wish to fully explore a zone, or if you prefer to go by the number and letter listings.
A1 treasure map location
This Dying Light: The Beast treasure map is actually the closest to where you started the campaign. Just go to the park directly east of the Monastery. There, you’ll see a map underneath a dead body next to a bench.
A1 reward location
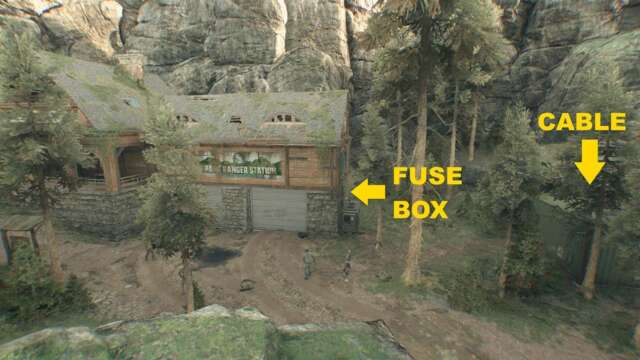
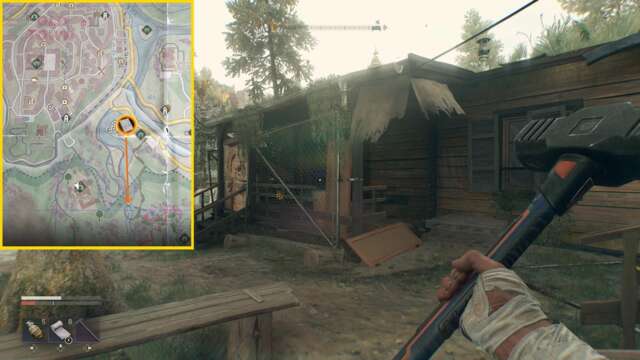
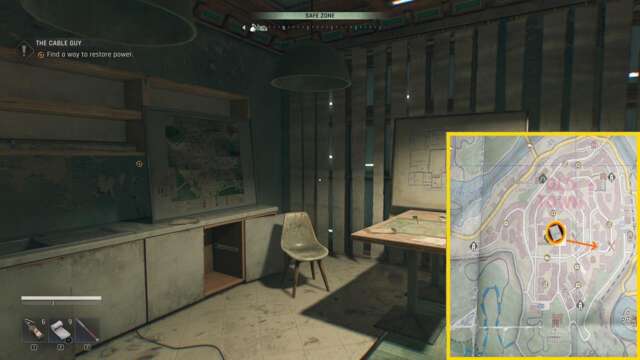
The map points you to a Park Ranger Station close to the Mountain Shelter Tower safe spot. Climb up the shed’s rooftop and go down to activate the generator. Then, bring the cable outside and connect it to the fuse box.
Reward: The Needle (legendary SMG)
A2 treasure map location
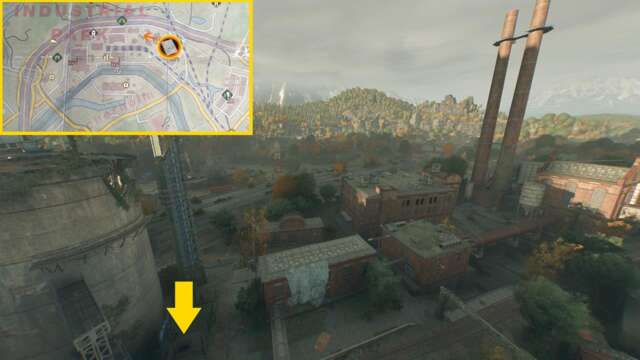
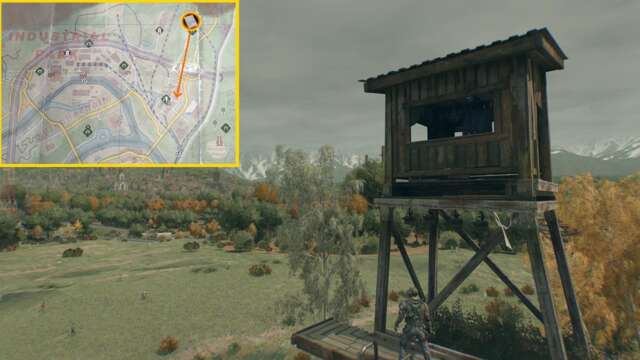
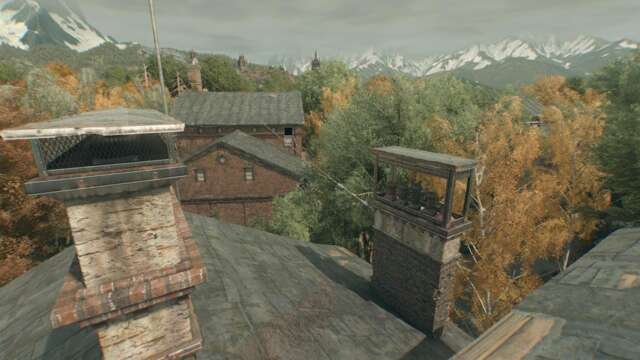
You’ll travel to the Industrial Park as part of a main mission called “A New Strain.” There’s a pretty good chance that you’d see the Chimneys Tower nearby. Climb carefully to unlock it as a safe spot. Then, go to the top of the chimney and cross the gap to the other tower. You’ll be able to pick up the map from there.
A2 reward location
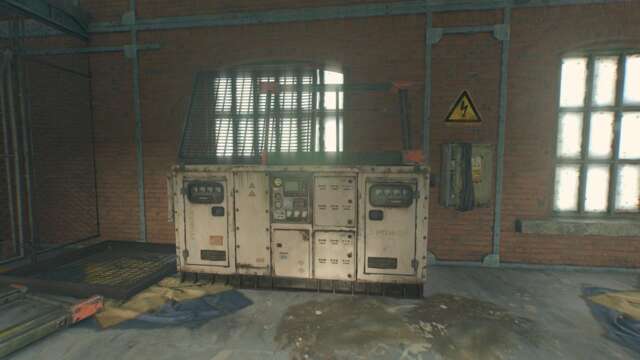
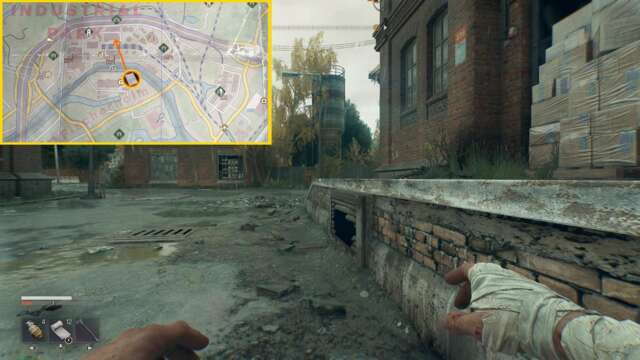
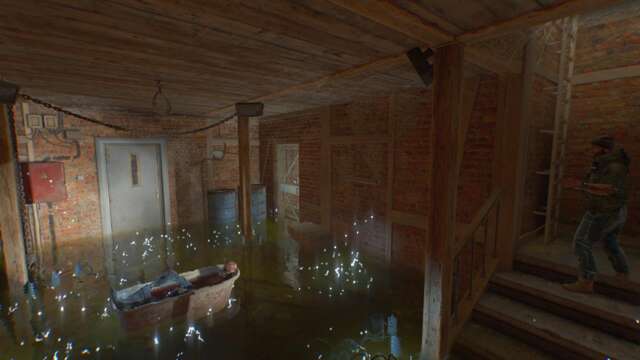
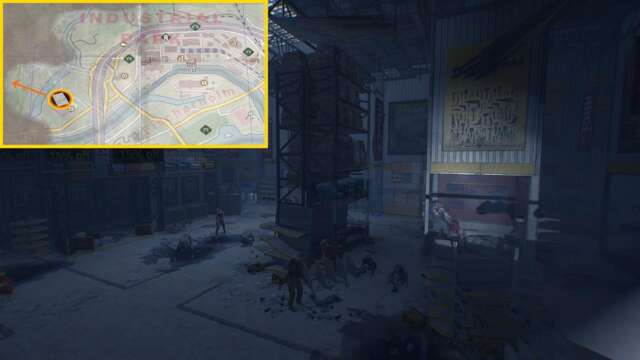
The reward is actually in a fenced off area at the side of the factory. You have to swim underwater, then resurface in a small room with a couple of zombies. You should see a generator as well.
There’s just one glaring problem: It seems the object itself is bugged. You might not be able to turn on the generator or, even if you’re able to, there’s no way to pull the cable out. Unfortunately, we just need to wait for a fix for this one.
A3 treasure map location and reward
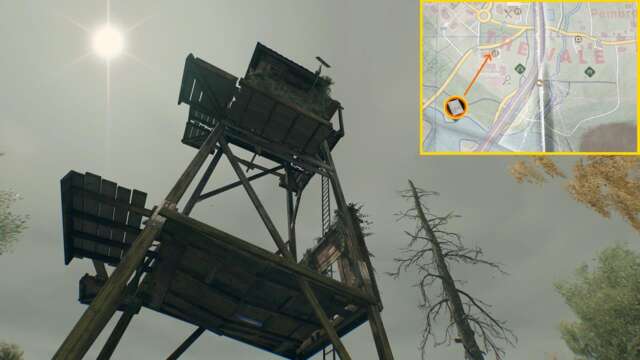
You’ll find the map in the Farms Tower, which is at the southern part of The Vale. You could actually see your next destination in the distance.
Head over to the ruins to the southeast. There’s a shed nearby that has a generator and a cable. Pull the cable and climb the upper section of the ruins to connect it to the fuse box. This unlocks the hatch below.
Jump down and take out a few enemies. Once you see the next fuse box, head back to the top so you can bring the cable with you down the ladder. This unlocks the doors in the survivalist’s shelter.
Reward: The Eraser (legendary rifle)
A4 treasure map location
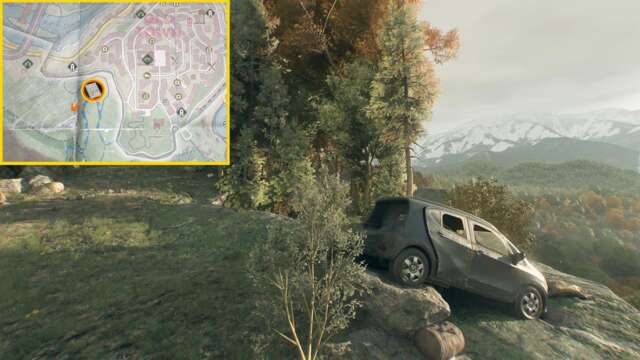
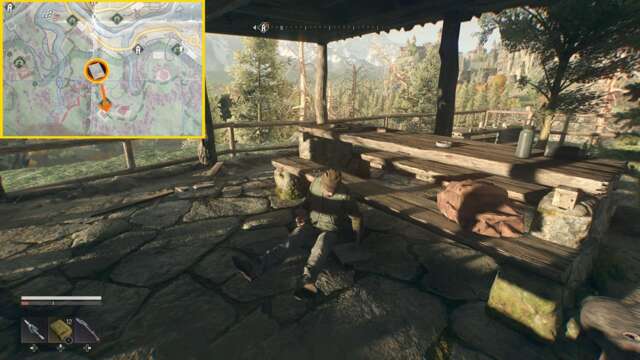
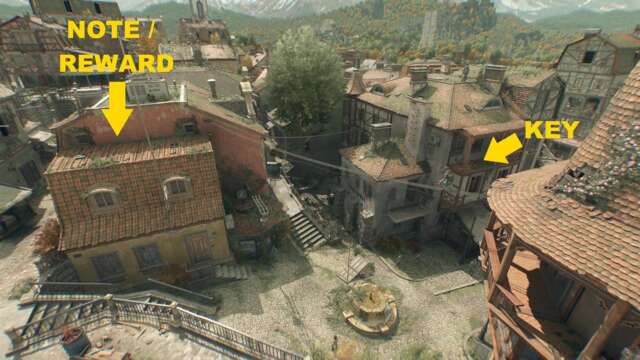
This treasure map is due west of Hardwood Art Gallery in Old Town. Head up the bluffs until you see a crashed car. The map is right beside the backpack by the right rear wheel.
A4 reward location
Go up the sloping path and keep heading west until you stumble upon a lone hatch in a clearing. Here’s what you need to do next:
- Climb down and lockpick the door to your left.
- Restore power to the generator.
- Check the room to your right and pass through the ventilation duct.
- Inspect the corpse to obtain a keycard. Use the keycard to unlock the door in the main corridor.
Rewards:
- Rogue Jacket (epic chestpiece)
- UV Bars (legendary throwable)
B1 treasure map location
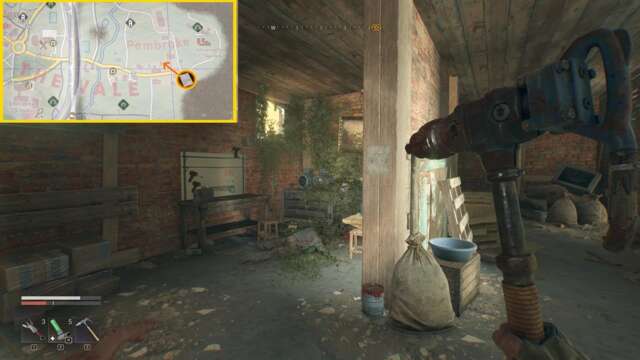
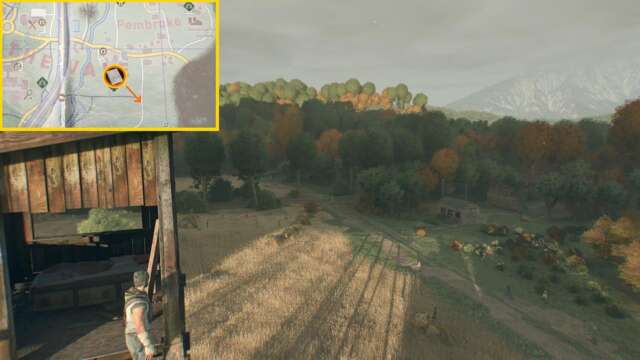
Trying to find this Dying Light: The Beast treasure map can be a little tricky since it’s well off the beaten path. Basically, you need to check a barn at the eastern edge of The Vale. Specifically, it’s at the junction where the roads leading to Pembroke and Alimental Food Swinery Meet. Once inside, read the note and grab the map from the post.
B1 reward location
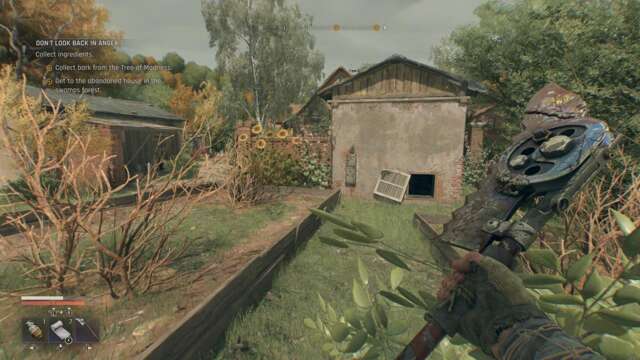
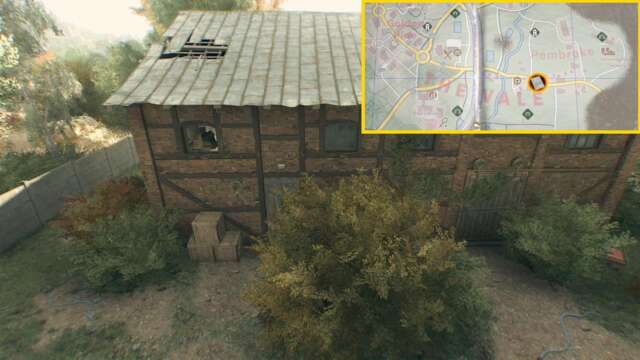
Go slightly northeast of your previous location until you see a couple of houses and a yard that’s full of undead. Check the back by the field to spot a grate. Pry it open so you can get the cable. Bring it back to the yard and connect it to the fuse box to unlock the door.
Reward: The Statement (legendary shotgun)
B2 treasure map location
For this Dying Light: The Beast Treasure Hunt, you need to start a quest called “A Sign of Love.” The quest comes from Jenna in Exiles’ Cave, so make sure you progress further into the campaign until it becomes available.
Anyway, your goal is to search the house in the marked location for signs of Ron and Anna. Enter through the patio door and go downstairs. You’ll see the note in the study room that’s full of maps, coordinates, and other documents.
B2 reward location
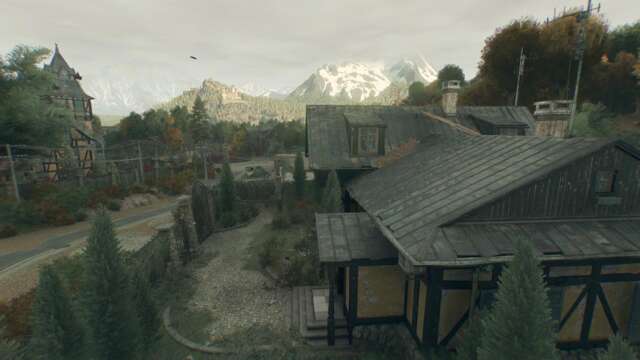
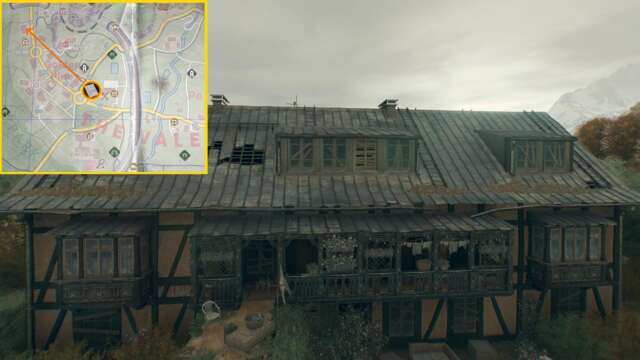
Next, you have to head to a two-storey house near a ruined diner at the edge of the city–i.e. it’s the large house north of the Vanity Store dark zone. Check the bathroom and acquire the fuse from the corpse.
Go back outside and look for a hatch. Drop down and place the fuse to restore power to the cellar. Inside the bedroom, you’ll see a safe neatly placed inside a vent. Use the code 2-2-19 to unlock it. (Note that the clue comes from the Bloodsucking Bunnies poster.
Reward: Sunray (legendary revolver)
B3 treasure map location and reward
This is also part of another side quest that comes from an NPC in Exiles’ Cave. Here’s a quick summary:
- Talk to Amelia and Iris to start the “Last Wish” quest.
- One of the tasks involves checking Iris’ home, which is the Nate Market dark zone in The Vale.
- You’ll visit a second Nate Market dark zone, this time in Old Town.
- After progressing a bit, you’ll realize that someone stole Iris’ safe. Keep using Survivor Sense to track the footprints of the thieves.
- You’ll be led to a garage to the east. Climb up the crates to enter the building and take out the hostiles inside.
- Use the code 20-7-6 to unlock Iris’ safe. Bring the music box to her in Exiles’ Cave to complete the quest.
Note: You’ll find a different map–Treasure Hunt C4–in the basement of Iris’ home. We discuss this part a bit later in our guide.
B4 treasure map location
The location of this Treasure Hunt is fairly close to where you tackle the “Chain Reaction” side quest. Enter the cabin with the red “X” mark. Grab the map from the dresser behind the door.
B4 reward location
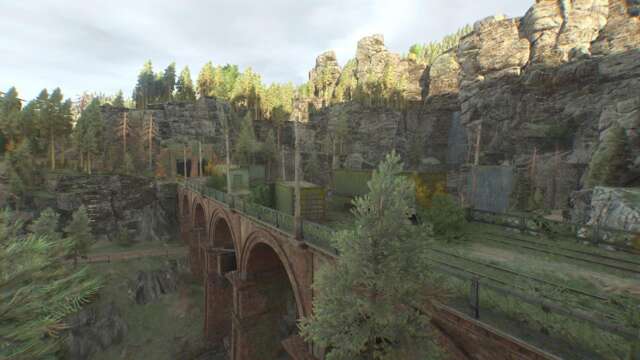
This Dying Light: The Beast Treasure Hunt takes you all the way back to the Monastery. From that safe zone, go east until you see a bridge with railroad tracks and “not-quite-abandoned” trains. Here’s what you need to do:
- Lockpick the two train cars to open their respective doors.
- One train car has an undead soldier that drops a keycard. The other has an electronic panel and fuse box.
- Check the open train car for a generator. Grab the cable and connect it to the fuse box. Then, swipe the keycard to claim your prize.
- Do watch out for elite zombies that might pop up while you’re doing the above steps.
Reward: The Elite (legendary pistol)
C1 treasure map location
This map is inside a small building right across from the Taurus Megastore dark zone. It’s saddled between the Industrial Park and the Fischerholm sub-zone.
C1 reward location
The reward is some distance away to the north. It’s in one of the upper sections of the towering building. Once inside, you’ll see the numerical code: 85-20. It seems that something is missing, right?
Well, if you shine your UV flashlight on the board, you’ll see the third number: 48. Input the code 85-20-48 to open the safe on the desk.
Reward: Military Medkit (legendary consumable)
C2 treasure map location
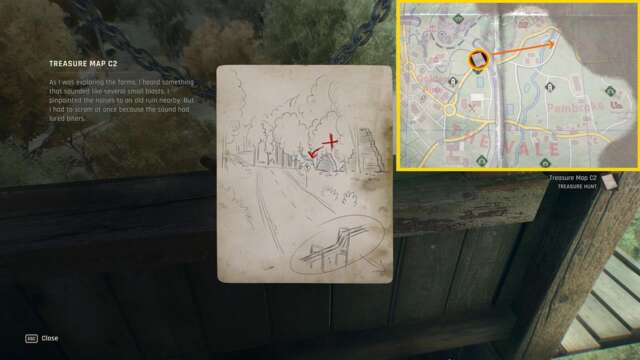
You can find this map if you climb and unlock the Highway Tower safe spot. It’s due northeast of Golden Pine in The Vale.
C2 reward location
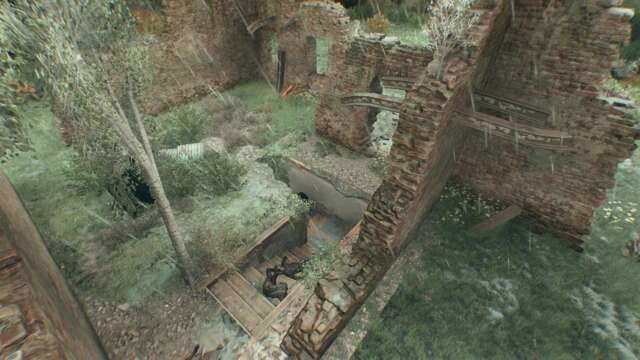
To claim your prize, keep going northeast until you see a twisting path near the Municipal Sewage Treatment Plant. There, you’ll stumble upon some ruins. Make your way down carefully and avoid triggering the landmines.
Reward: Inferno (blueprint)
C3 treasure map location
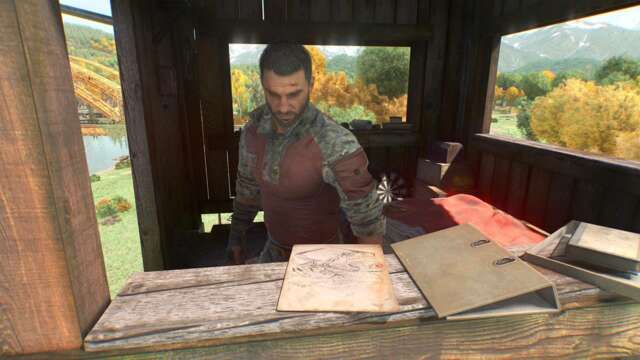
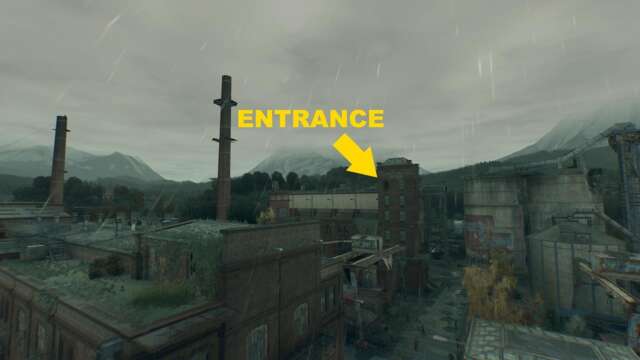
The most challenging part about obtaining this Dying Light: The Beast treasure map is the climb. That’s because it’s all the way at the very top of the Silos safe zone, which is east of Pembroke. Once you’ve unlocked the safe zone permanently, check the desk for an illustration.
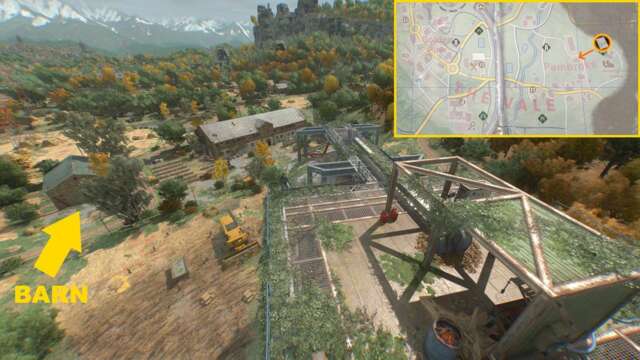
C3 reward location
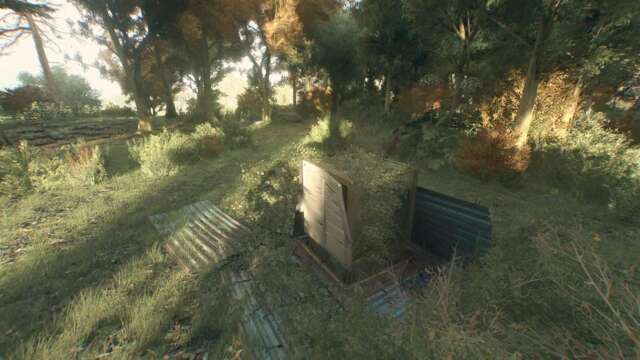
Your goal now is to go back down to the barn (which you might’ve noticed in the previous image). Activate the generator once inside to open the hatch.
Be careful because the water is electrified. You need to toss a throwing knife at the fuse box to disable the electric current.
Reward: Assorted epic weapons and materials
C4 treasure map location

Remember what we mentioned earlier regarding the “Last Wish” quest–i.e. the one that completes the B3 Treasure Hunt? Well, there’s another map in the basement of Iris’ house/Nate Market. Be sure to search her abode for a key so you can gain access to it.
C4 reward location
Okay, do you still recall the garage where the thieving soldiers took Iris’ safe? Yes, the reward is still in the same general area.
- At the back of the building, you’ll notice a generator. Power it up and climb down the hatch at the left-hand side.
- Move the wooden board and pass through the vent to claim a few goodies.
Reward: Epic weapons and assorted materials
D1 treasure map location
The D1 treasure map can be found in the River Tower safe spot. It’s by the river south of Emil’s Brick School in The Vale.
D1 reward location
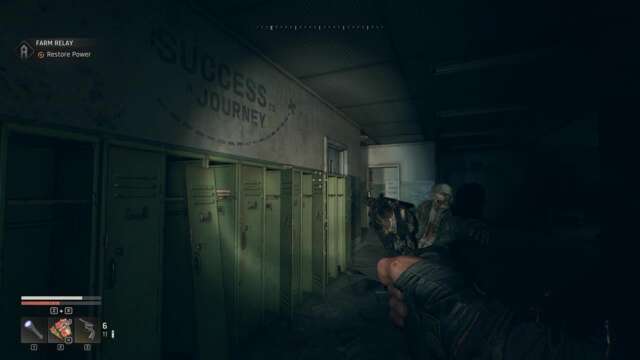
The location that you visit for this Dying Light: The Beast Treasure Hunt is actually part of a main mission called “School’s Out,” which is actually one of the most harrowing segments in the campaign. You can go to this place whenever you wish, even while free-roaming.
In any case, the goal is to reach the hallway with the lockers. Nearby, there’s a small office with a whiteboard that has binary numbers scrawled on it. If you convert these into decimals, you’ll get 5-40-90.
Reward: Assorted valuables
D2 treasure map location
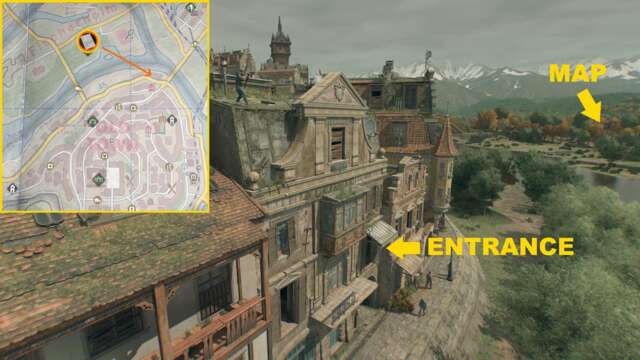
The map is in the Recreation Island Tower, which is along the riverbank separating Fischerholm and Old Town. You then have to cross the river to reach your destination.
D2 reward location
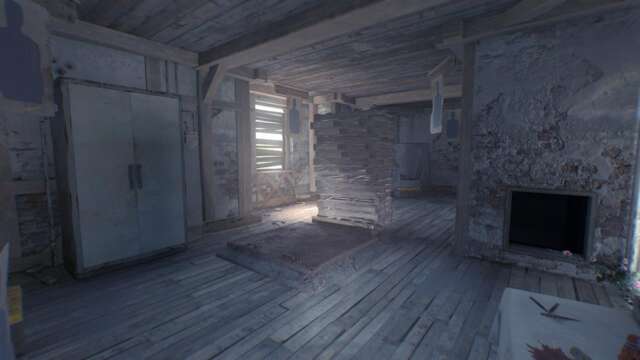
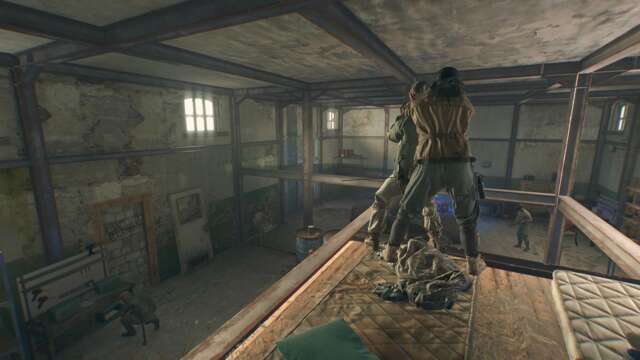
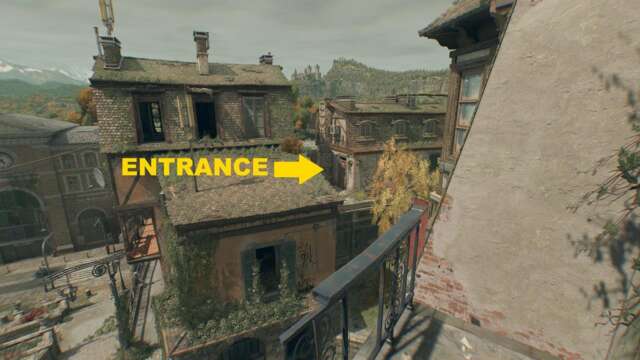
The objective is to enter a specific room in an apartment complex, which we’ve marked with an arrow in the previous image. Once inside, go through the vent and climb to the top floor using the pipe.
You’ll find yourself in a room that seems to have been turned into someone’s target practice area. The key is at the back of the room behind a cardboard target on the floor. Destroy the cardboard target, grab the key, and open the dressed for your reward.
Rewards:
- Various types of knives (legendary throwable)
- UV Bar (legendary throwable)
D3 treasure map location

For the D3 treasure map, you must enter the Station Sq. Apartment dark zone. Pass through the vent until you reach the second floor. Then, take out or avoid the zombies in the hallway and check the room to your right.
D3 reward location
After grabbing the map, return to the vents area and use the second duct that leads further to the top. Upon exiting, you’ll see an apartment door that’s boarded up. Head over there and move the wooden board.
Read the note, which is actually a very obvious clue for the safe code. Input 12-25-55 to unlock the safe next to the dresser.
Rewards:
- Military Medkit (legendary consumable)
- Regeneration Booster (legendary consumable)
D4 treasure map location and reward
Earlier, we mentioned that a mission called “A New Strain” takes you to the Industrial Park to the northwest. Well, if you’ve been exploring the area, you’ve probably tagged the Highway Bus Refuge safe zone. The map is inside the abandoned bus/makeshift shelter.
As for your prize, just climb up the pipe and shimmy along the ledges. Once you get to the rooftop, look for a hatch that you can open. There’s an enemy down below, so just eliminate it and obtain some goodies.
Reward:
- Blaze (blueprint)
- Bleeding Mine (legendary throwable)
E1 treasure map location
For this Treasure Hunt in Dying Light: The Beast, you must make your way to the Hardware Store dark zone. It’s at the western edge of the Industrial Park.
This area is crawling with so many nightmarish ghouls, so you should either be careful or be quick when moving around. Anyway, crawl through the opening and unlock the administrative office. Inside, you’ll find the Slit blueprint, as well as a corpse that has the map.
E1 reward location
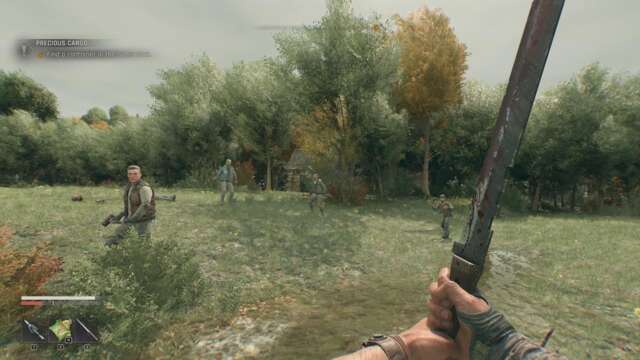
The reward is located further west of the Hardware Store. Hurry across the grasslands until you see a lone cabin. A few bandits are guarding this area, so take them out, along with other zombies nearby.
Reward: Rogue Fingerless Gloves (epic gloves)
E2 treasure map location
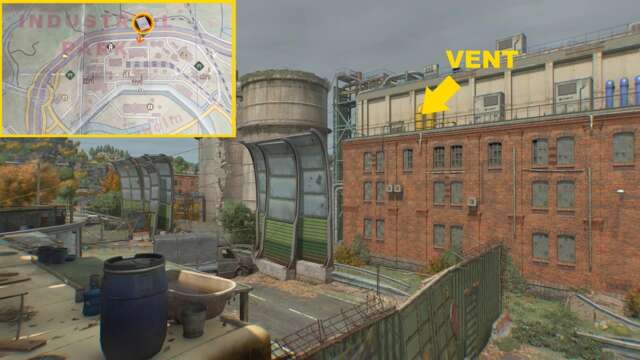
This treasure map is at the very top of yet another chimney in the Industrial Park. It’s connected to the building between the Factory Relay substation and Warehouse dark zone.
E2 reward location
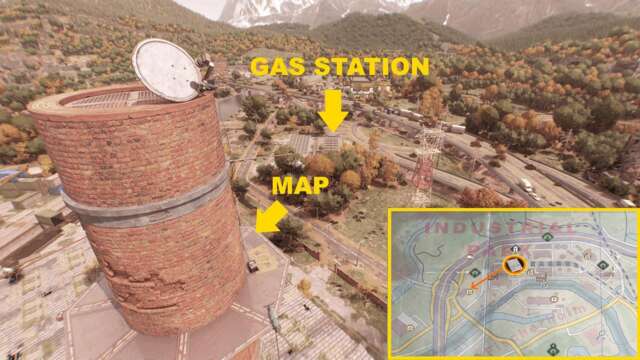
Your task now is to check out the Taurus Gas Station dark zone. The fastest way to get there is via the zipline where you obtained the map.
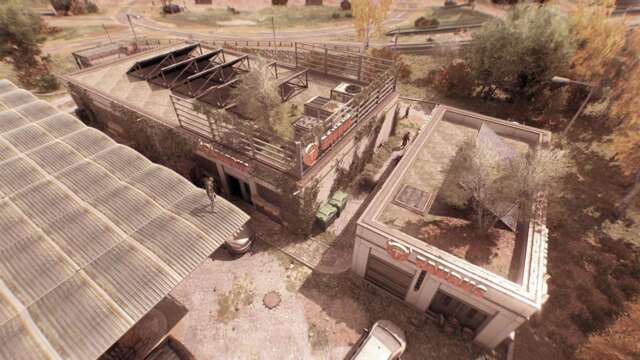
- Once you’re at your destination, open the hatch on the shed’s rooftop. Make sure you read the note on the bulletin board. It tells you that you need a fuse.
- Enter the gas station and watch out for a dozen creepy enemies. Look for a fuse in one of the shelves.
- Place the fuse back in the shed to restore power to the building. Then, eliminate more hostiles once the doors open.
Reward: UV Bar (legendary throwable) and assorted materials
E3 treasure map location
Funnily enough, this Dying Light: The Beast treasure map is just in one of the rooms in the Town Hall. It’s on the information board about Castor Woods next to one of the quest givers.
E3 reward location
This part can be a bit of a doozy:
- Go to the belfry tower east of the Town Hall. There’s an apartment with an open window on the ground floor.
- Pass through the vent and push the wooden board. You’ll stumble upon a locked cabinet.
- Be sure to read the note that tells you about the Trattoria establishment.
- Return outside and look for an apartment next to the Trattoria sign.
- Enter via the window on the second floor and pick up the key from the corpse. Note that this key won’t appear if you didn’t read the note.
- Go back to the previous apartment and open the cabinet.
Rewards:
- Military Medkit (legendary consumable)
- Resistance Booster (legendary consumable)
E4 treasure map location
You can start this Dying Light: The Beast Treasure Hunt by climbing up the Cargo Station Tower safe spot. It’s further to the east of the Industrial Park.
E4 reward location
From the Cargo Station Tower, keep going south until you arrive at the Cement Gardens:
- Check the rooftops for a house with a vent duct that you can pry open.
- Inside, you’ll see a detached cable that has gone haywire.
- Go downstairs and turn off the generator. This will allow you to repair the cable.
- Turn the generator back on. The metal gate should be unlocked and the zombies inside will get fried by the UV light.
Rewards:
- Remote C4 (legendary throwable)
- EP04 Whispers in the Woods (collectible)
That does it for our guide on where to find all treasure maps in Dying Light: The Beast. We hope you have an frenetically good time exploring Castor Woods.